
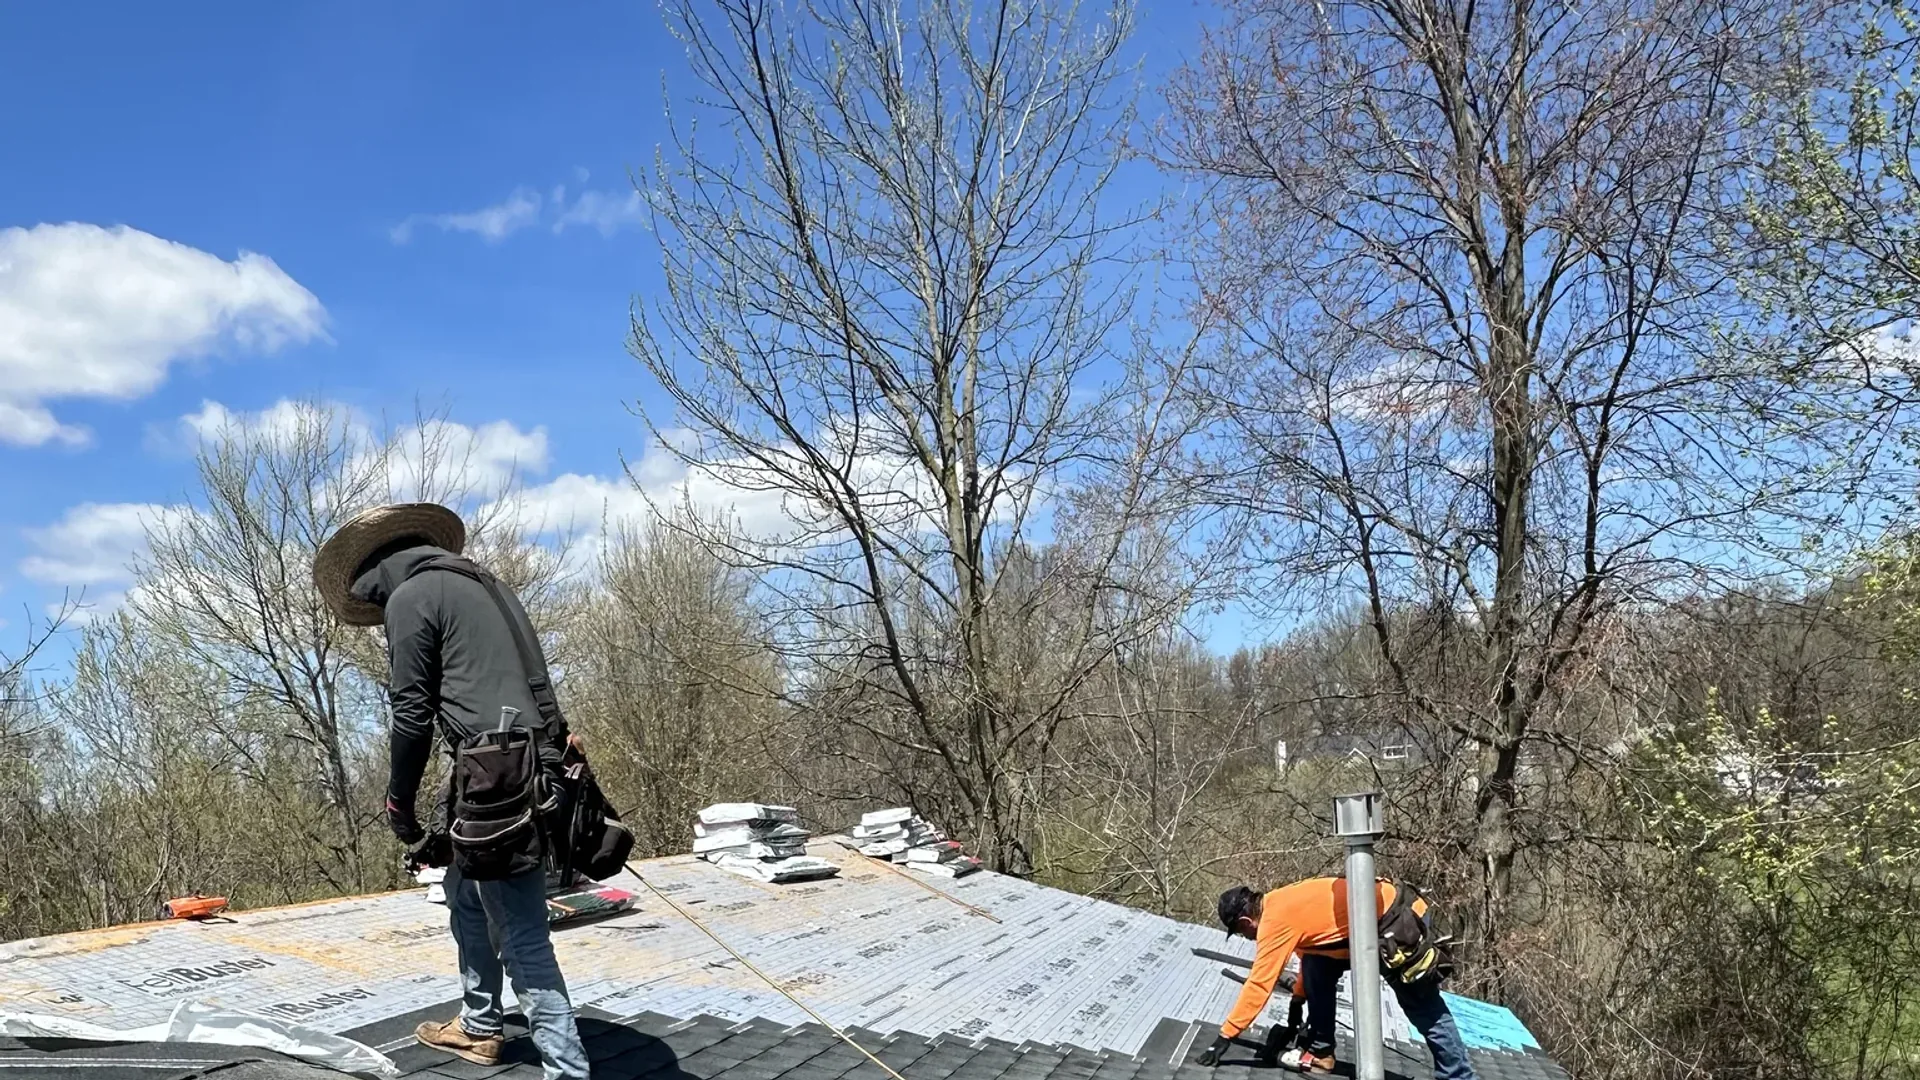
A finished asphalt roof looks simple from the driveway. You see shingle courses, ridges, and a few vents. The work that keeps water out also includes several layers hidden below that surface.
Those hidden materials are not interchangeable extras. The roof deck supports the system. Underlayment provides a secondary drainage plane. Leak barriers reinforce vulnerable areas. Flashing moves water around walls and penetrations. Each part must overlap the next one in the direction water travels.
The Roof Assembly From the Attic Up
Roof systems vary, but a typical asphalt shingle assembly can include the structural framing, roof decking, underlayment, selected self-adhered leak barriers, metal flashing, shingles, and ventilation components. The layers are installed in a planned sequence so water moves toward the eave instead of into a seam.
A product name by itself does not prove the assembly is sound. The crew still has to prepare the deck, keep the materials flat, make the correct laps, place fasteners properly, and integrate every edge and penetration.
Layer 1: Roof Decking
Decking is the solid surface fastened to the roof framing. Many homes have plywood or oriented strand board. Older homes may have spaced or solid wood boards. The deck carries the roofing system and gives shingle fasteners a stable surface.
Water stains do not always mean the wood has lost its strength, but soft spots, rot, delamination, broken edges, and large openings need attention. Covering weak decking can leave fasteners with poor hold and create an uneven surface under the new shingles.
This is one reason a full tear-off provides useful information. Once the old roofing is removed, the crew can walk the deck, inspect it around valleys and penetrations, and photograph repairs before new material covers the area. Our guide to overlays versus tear-offs explains what remains hidden when old shingles stay in place.
Deck repairs should not be a surprise with no pricing terms
An estimate cannot predict every concealed sheet or board, but it can explain how damaged decking will be documented, approved, and priced. Ask for that process before work starts.
Layer 2: Roof Underlayment
Underlayment lies between the deck and the shingles. It provides a secondary water-shedding surface when wind-driven rain, a damaged shingle, or installation work allows moisture below the finish. It also separates the shingles from the wood deck.
Underlayment does not turn an unfinished roof into a permanent roof. Water can still find poorly lapped seams, torn areas, open penetrations, and incorrect transitions. Exposure limits and fastening instructions vary by product, so the crew should protect and cover it according to the written requirements.
Asphalt-saturated felt
Traditional roofing felt has served as underlayment for many years. It can wrinkle after absorbing moisture and may tear during handling or high wind before the shingles are installed. Weight, fastening, slope, and exposure all affect how a specific product should be used.
Synthetic underlayment
Synthetic products are commonly chosen because they are light, strong, and available in wide rolls. Many resist tearing and wrinkling better than traditional felt. They are not all the same, so slip resistance, vapor properties, fastening patterns, and exposure limits should be checked for the exact material.
Layer 3: Self-Adhered Leak Barriers
A self-adhered membrane is used in selected areas that face concentrated water or difficult transitions. Depending on the roof and applicable requirements, those areas may include eaves, valleys, roof-to-wall intersections, and penetrations.
This material is often called ice and water protection because it can help defend the deck when water backs up near a cold roof edge. That matters in West Michigan, where snow can melt over warmer roof areas and refreeze near an eave. The membrane still needs a clean deck, compatible materials, smooth application, and correct laps.
More membrane is not automatically better. Trapping moisture in the wrong assembly can create a different problem. Placement should match the roof design, ventilation approach, product instructions, and applicable requirements rather than a one-size-fits-all sales line.
Layer 4: Flashing and Edge Metal
Flashing handles the places where shingles alone cannot make a clean water-shedding transition. Step flashing works along walls. Apron and counterflashing manage chimney intersections. Pipe boots seal around plumbing vents. Valley metal may form an open drainage channel. Edge metal helps direct water at the roof perimeter.
These pieces have to weave into the underlayment and shingles in the correct order. Smearing sealant over the top cannot recreate a hidden lap that sends water the wrong way. The same principle applies at a chimney, as explained in our guide to chimney flashing leaks.
Layer 5: Asphalt Shingles and Fasteners
Shingles are the primary weather surface. Their staggered courses shed water downhill while the laminated tabs create the finished appearance. Starter material protects the lower edge, and ridge caps finish hips and peaks.
Fastener location matters as much as shingle alignment. Nails placed too high, too low, crooked, or overdriven can miss the intended fastening zone or damage the shingle. Exposed fasteners and face nails also need the treatment specified for that detail.
A neat surface can still hide poor fastening or incomplete flashing. Installation photos taken before the final courses go down provide more useful evidence than finished-roof photos alone.
Ventilation Is Part of the Same System
Underlayment manages water from outside. Attic ventilation and air sealing help manage heat and moisture from inside the home. They do different jobs, but both affect the deck and shingles.
A replacement scope should not cover over existing intake or exhaust problems. Blocked soffit vents, mixed exhaust types, and bath fans dumping into the attic deserve attention before the final ridge details are installed. Read more in our attic ventilation guide.
What Can Go Wrong Below the Shingles
- ◆Weak or uneven decking is covered without repair or documentation.
- ◆Underlayment is torn, wrinkled, short-lapped, or left open around a penetration.
- ◆A leak barrier stops short of the vulnerable transition it was meant to protect.
- ◆Old wall, chimney, or vent flashing is reused without checking its condition and integration.
- ◆Shingle fasteners miss the intended zone or penetrate a flashing detail where water collects.
What to Ask Before Signing a Roofing Estimate
A useful scope names the hidden work instead of grouping everything under materials. Ask the contractor to identify:
- 01Deck inspection. Will the old roofing be removed, and how will damaged wood be documented and priced?
- 02Underlayment. Which exact product is included, and how will it be fastened and protected during installation?
- 03Leak barriers. Where will self-adhered protection be installed on this specific roof?
- 04Flashing. Which pieces will be replaced, rebuilt, or reused, and why?
- 05Documentation. Will you receive photos of the deck, membranes, flashing, and ventilation before the shingles cover them?
Our guide to reading a roofing estimate can help you compare the rest of two bids line by line.
Frequently Asked Questions
What is directly underneath asphalt shingles?
Most asphalt shingle systems have underlayment directly below the shingles and roof decking below the underlayment. Self-adhered leak barriers and metal flashing are also used at selected edges, valleys, walls, and penetrations. The exact assembly depends on the roof, shingle system, and applicable requirements.
Is roof underlayment waterproof?
Underlayment is a secondary water-shedding layer, not a finished roof covering. It helps manage water that reaches beneath the shingles, but its seams, fasteners, exposure limits, and transitions all matter. Self-adhered leak barriers provide added protection in selected vulnerable areas, but they also need correct installation.
Is synthetic underlayment better than roofing felt?
Synthetic underlayment is often lighter, stronger, and less prone to wrinkling than traditional asphalt-saturated felt. Felt remains available and can be appropriate in some assemblies. Product specifications, roof conditions, installation instructions, and the full roofing system matter more than choosing by label alone.
Can new shingles be installed over damaged roof decking?
Weak, delaminated, rotten, or badly damaged decking should be addressed before it is covered. The deck must provide a sound, even fastening surface. A tear-off allows the crew to inspect the full deck and document repairs before underlayment and shingles hide it again.
Why are leak barriers used at roof edges and valleys?
Edges, valleys, walls, and penetrations handle concentrated water or difficult transitions. A compatible self-adhered membrane can provide added protection below the visible roofing in those areas. Placement and integration should follow the roof design, product instructions, and applicable requirements.
How can I compare the hidden layers in two roofing estimates?
Look for named underlayment and leak-barrier materials, deck inspection and replacement terms, flashing details, ventilation work, manufacturer installation requirements, and photo documentation. A line that only says roofing materials does not explain what will be installed beneath the shingles.
Inspect the Layers Before They Disappear
The best time to judge decking, underlayment, leak barriers, and flashing is while the roof is open. Once the final shingles are down, good work and shortcuts can look almost identical from the ground.
Platinum Roofing inspects and replaces asphalt shingle systems across Grand Rapids, Jenison, Holland, Muskegon, Kalamazoo, and surrounding West Michigan communities. For a free roof inspection, call or text (616) 256-0831 or send the roof details through our contact form.